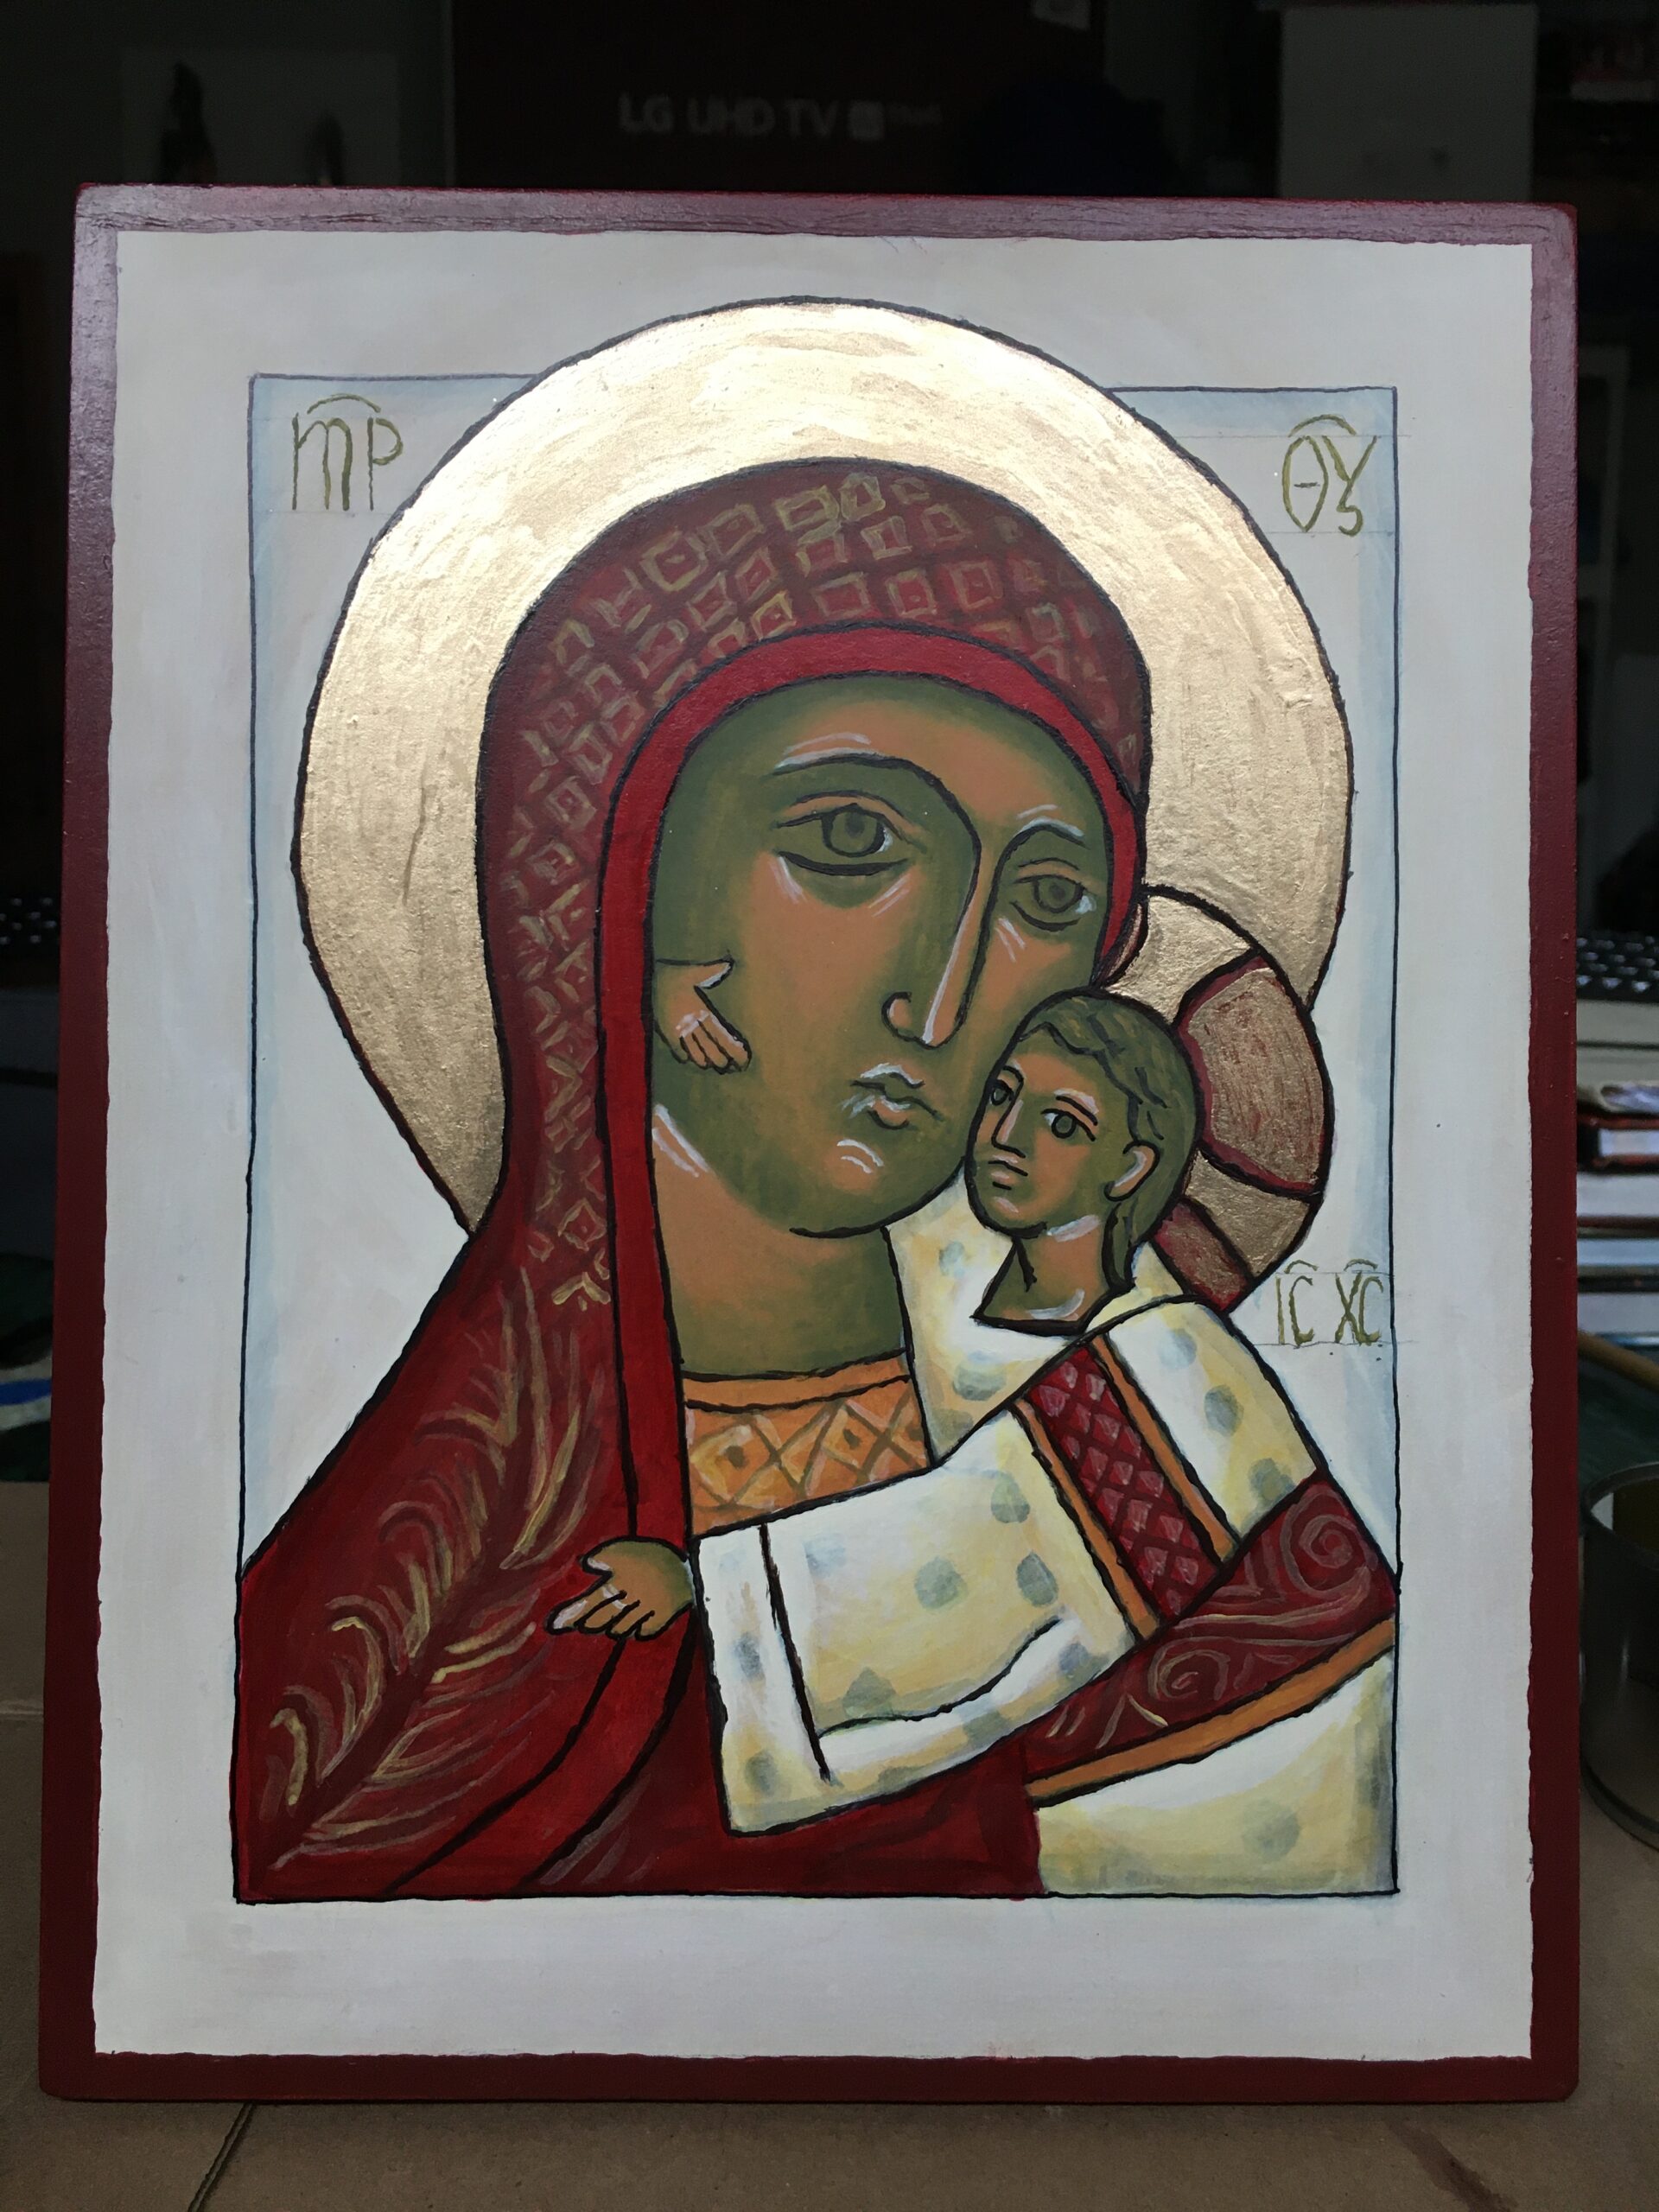
Hello Father Ortiz,As a writer of icons, every fall a write an icon of the Theotokos (God bearer). I then donate this icon to an individual or a church. I recently came across your church on the internet, and I was so moved by your story. This year I would like to write this icon for St. Paul’s Church. The photo enclosed is the icon that I will be writing for you. As I work on the icon, I will send photos of the progress. The icon board measures 8×10. It is such a blessing that I can celebrate the community of followers of Jesus at St. Paul’s Episcopal Church, Seymour TN. May Jesus Christ be praised as we all strive to follow the way of Jesus. Lord make us an instrument of your peace.
Regards,
Brother John Huebner, OSF
Franciscan Missionary Brother
Steps to writing your icon.
This prayer is used by many iconographers. It was written by Andrei Rublev (1400). I say this pray before working on the icon. The Byzantine Church attributes St. Luke the writer of St. Luke’s Gospel as the first to write an icon depicting the theotokos.
1. A board that is made of birch wood is prepared. Linen is glued to the front and sides. Then gesso (chalk and glue) is applied, about 8 layers. The front an sides are sanded and polished for a smooth surface.
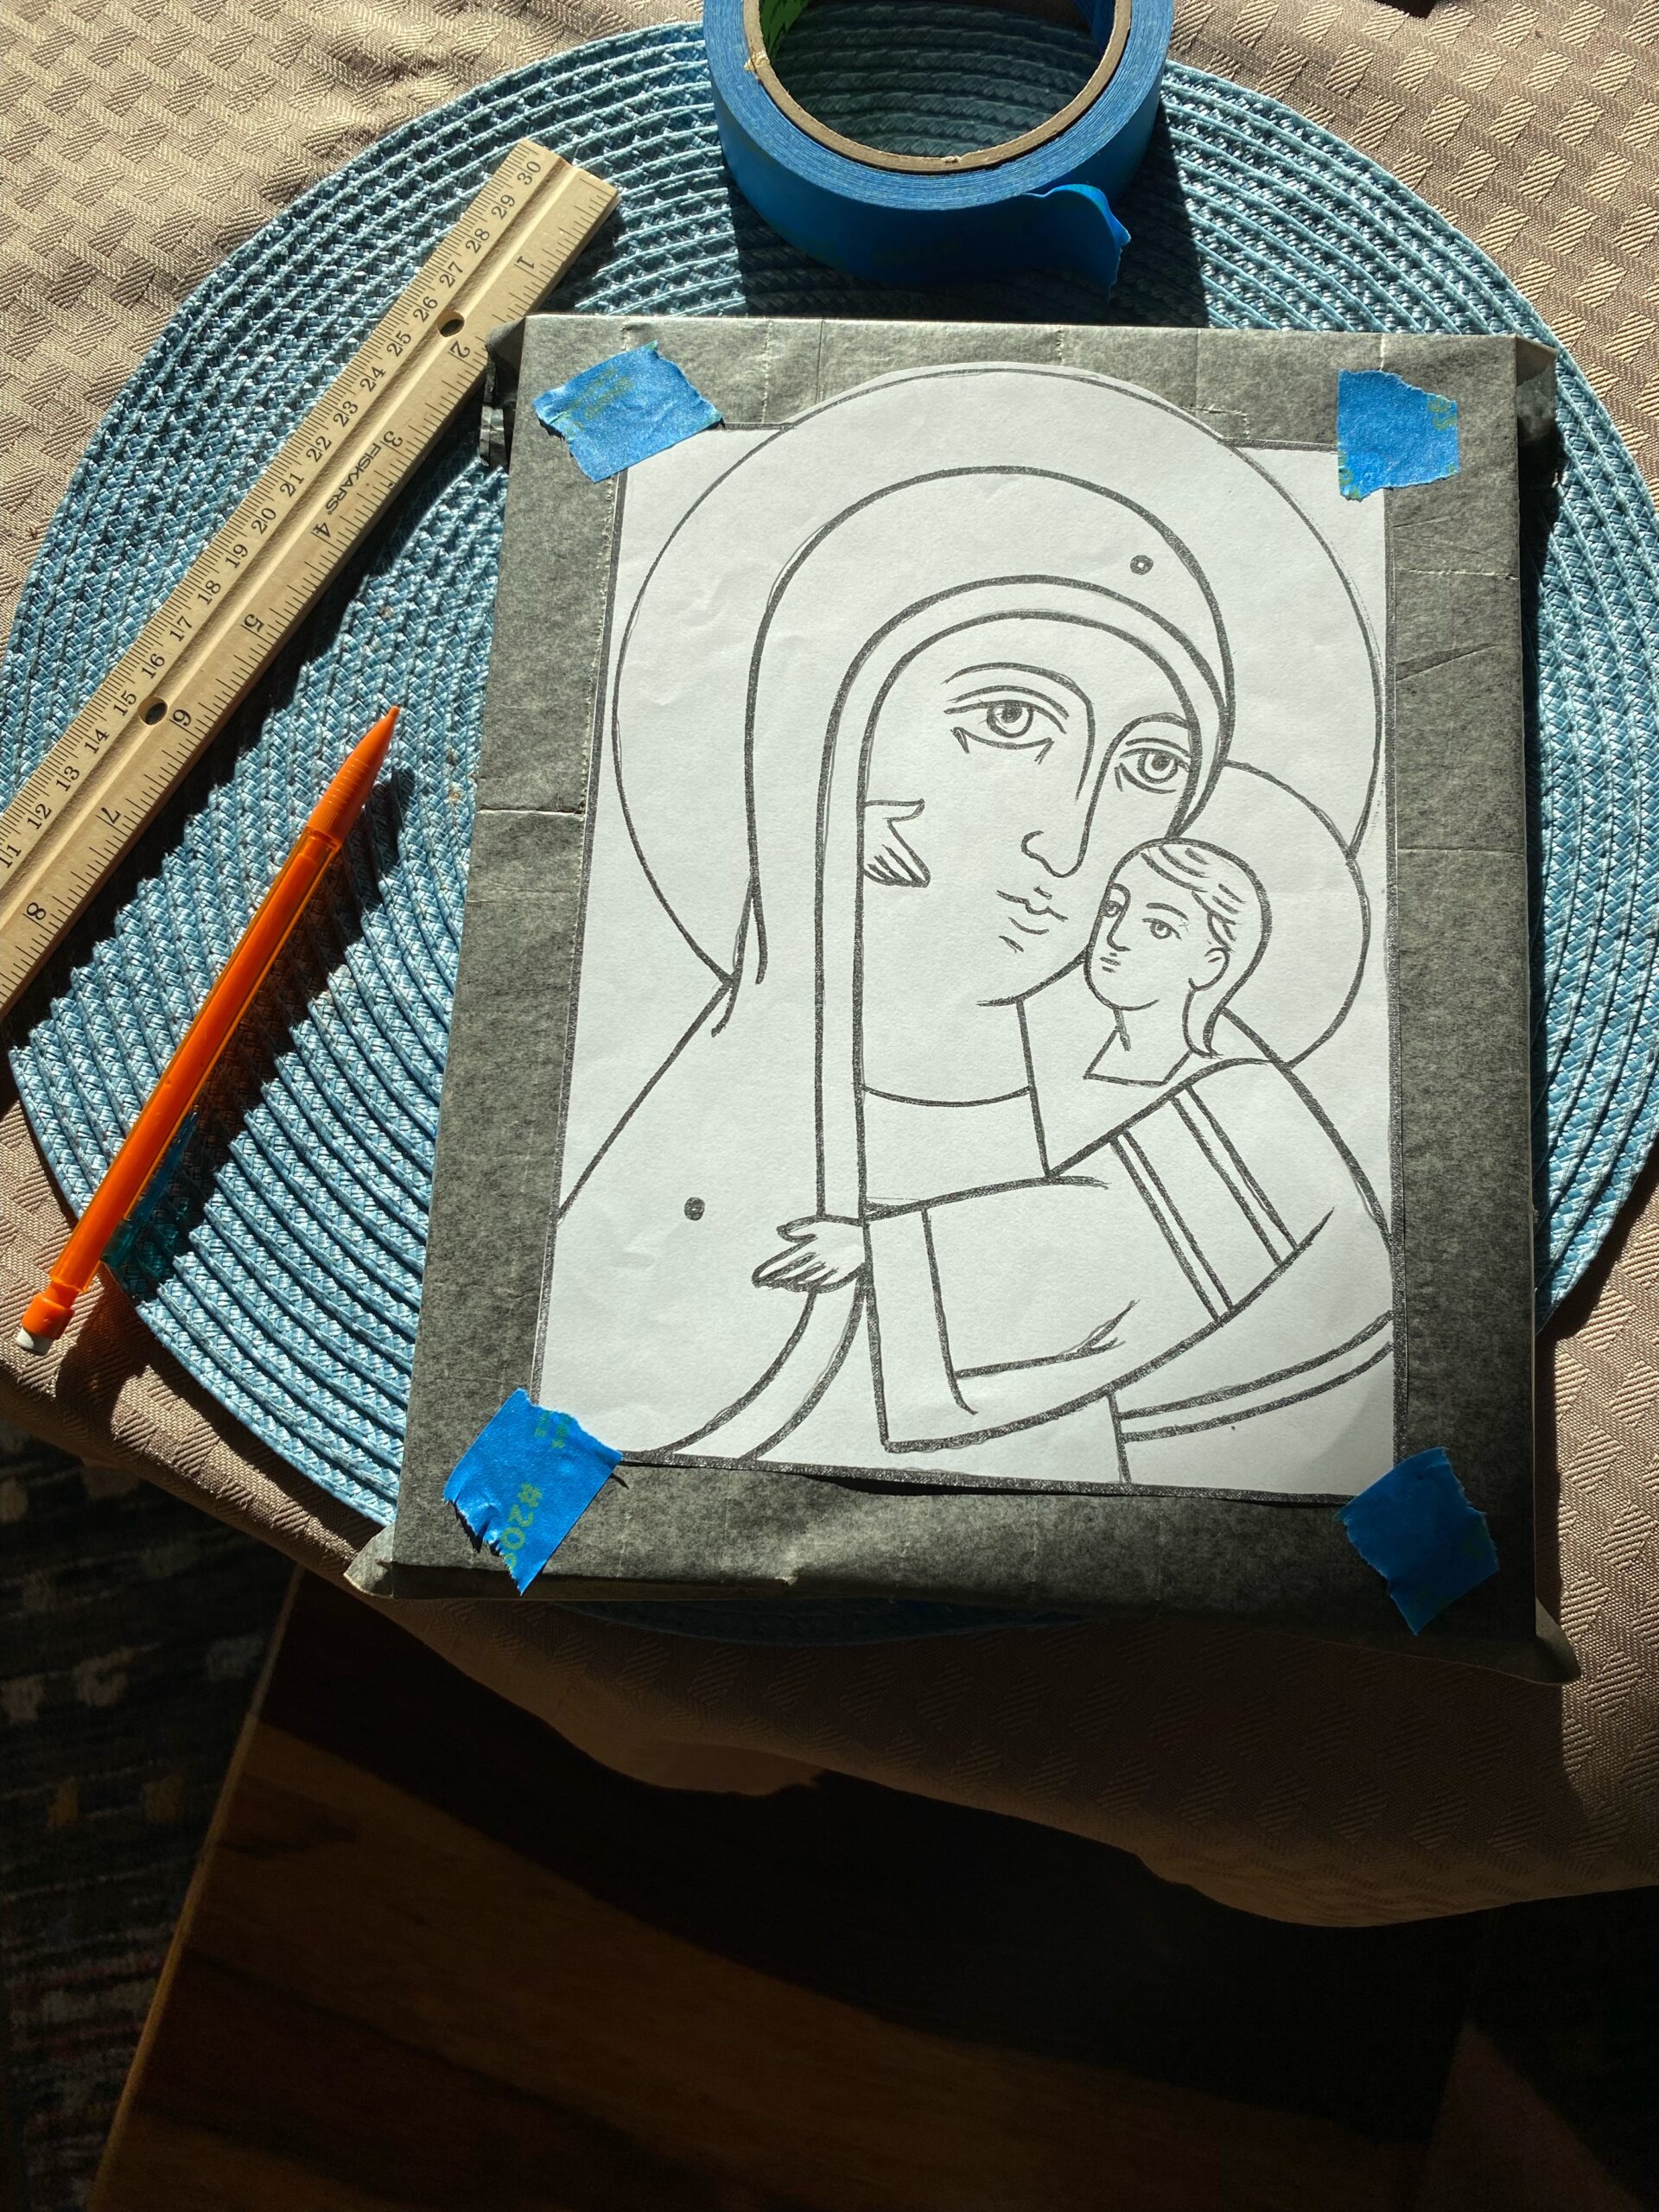
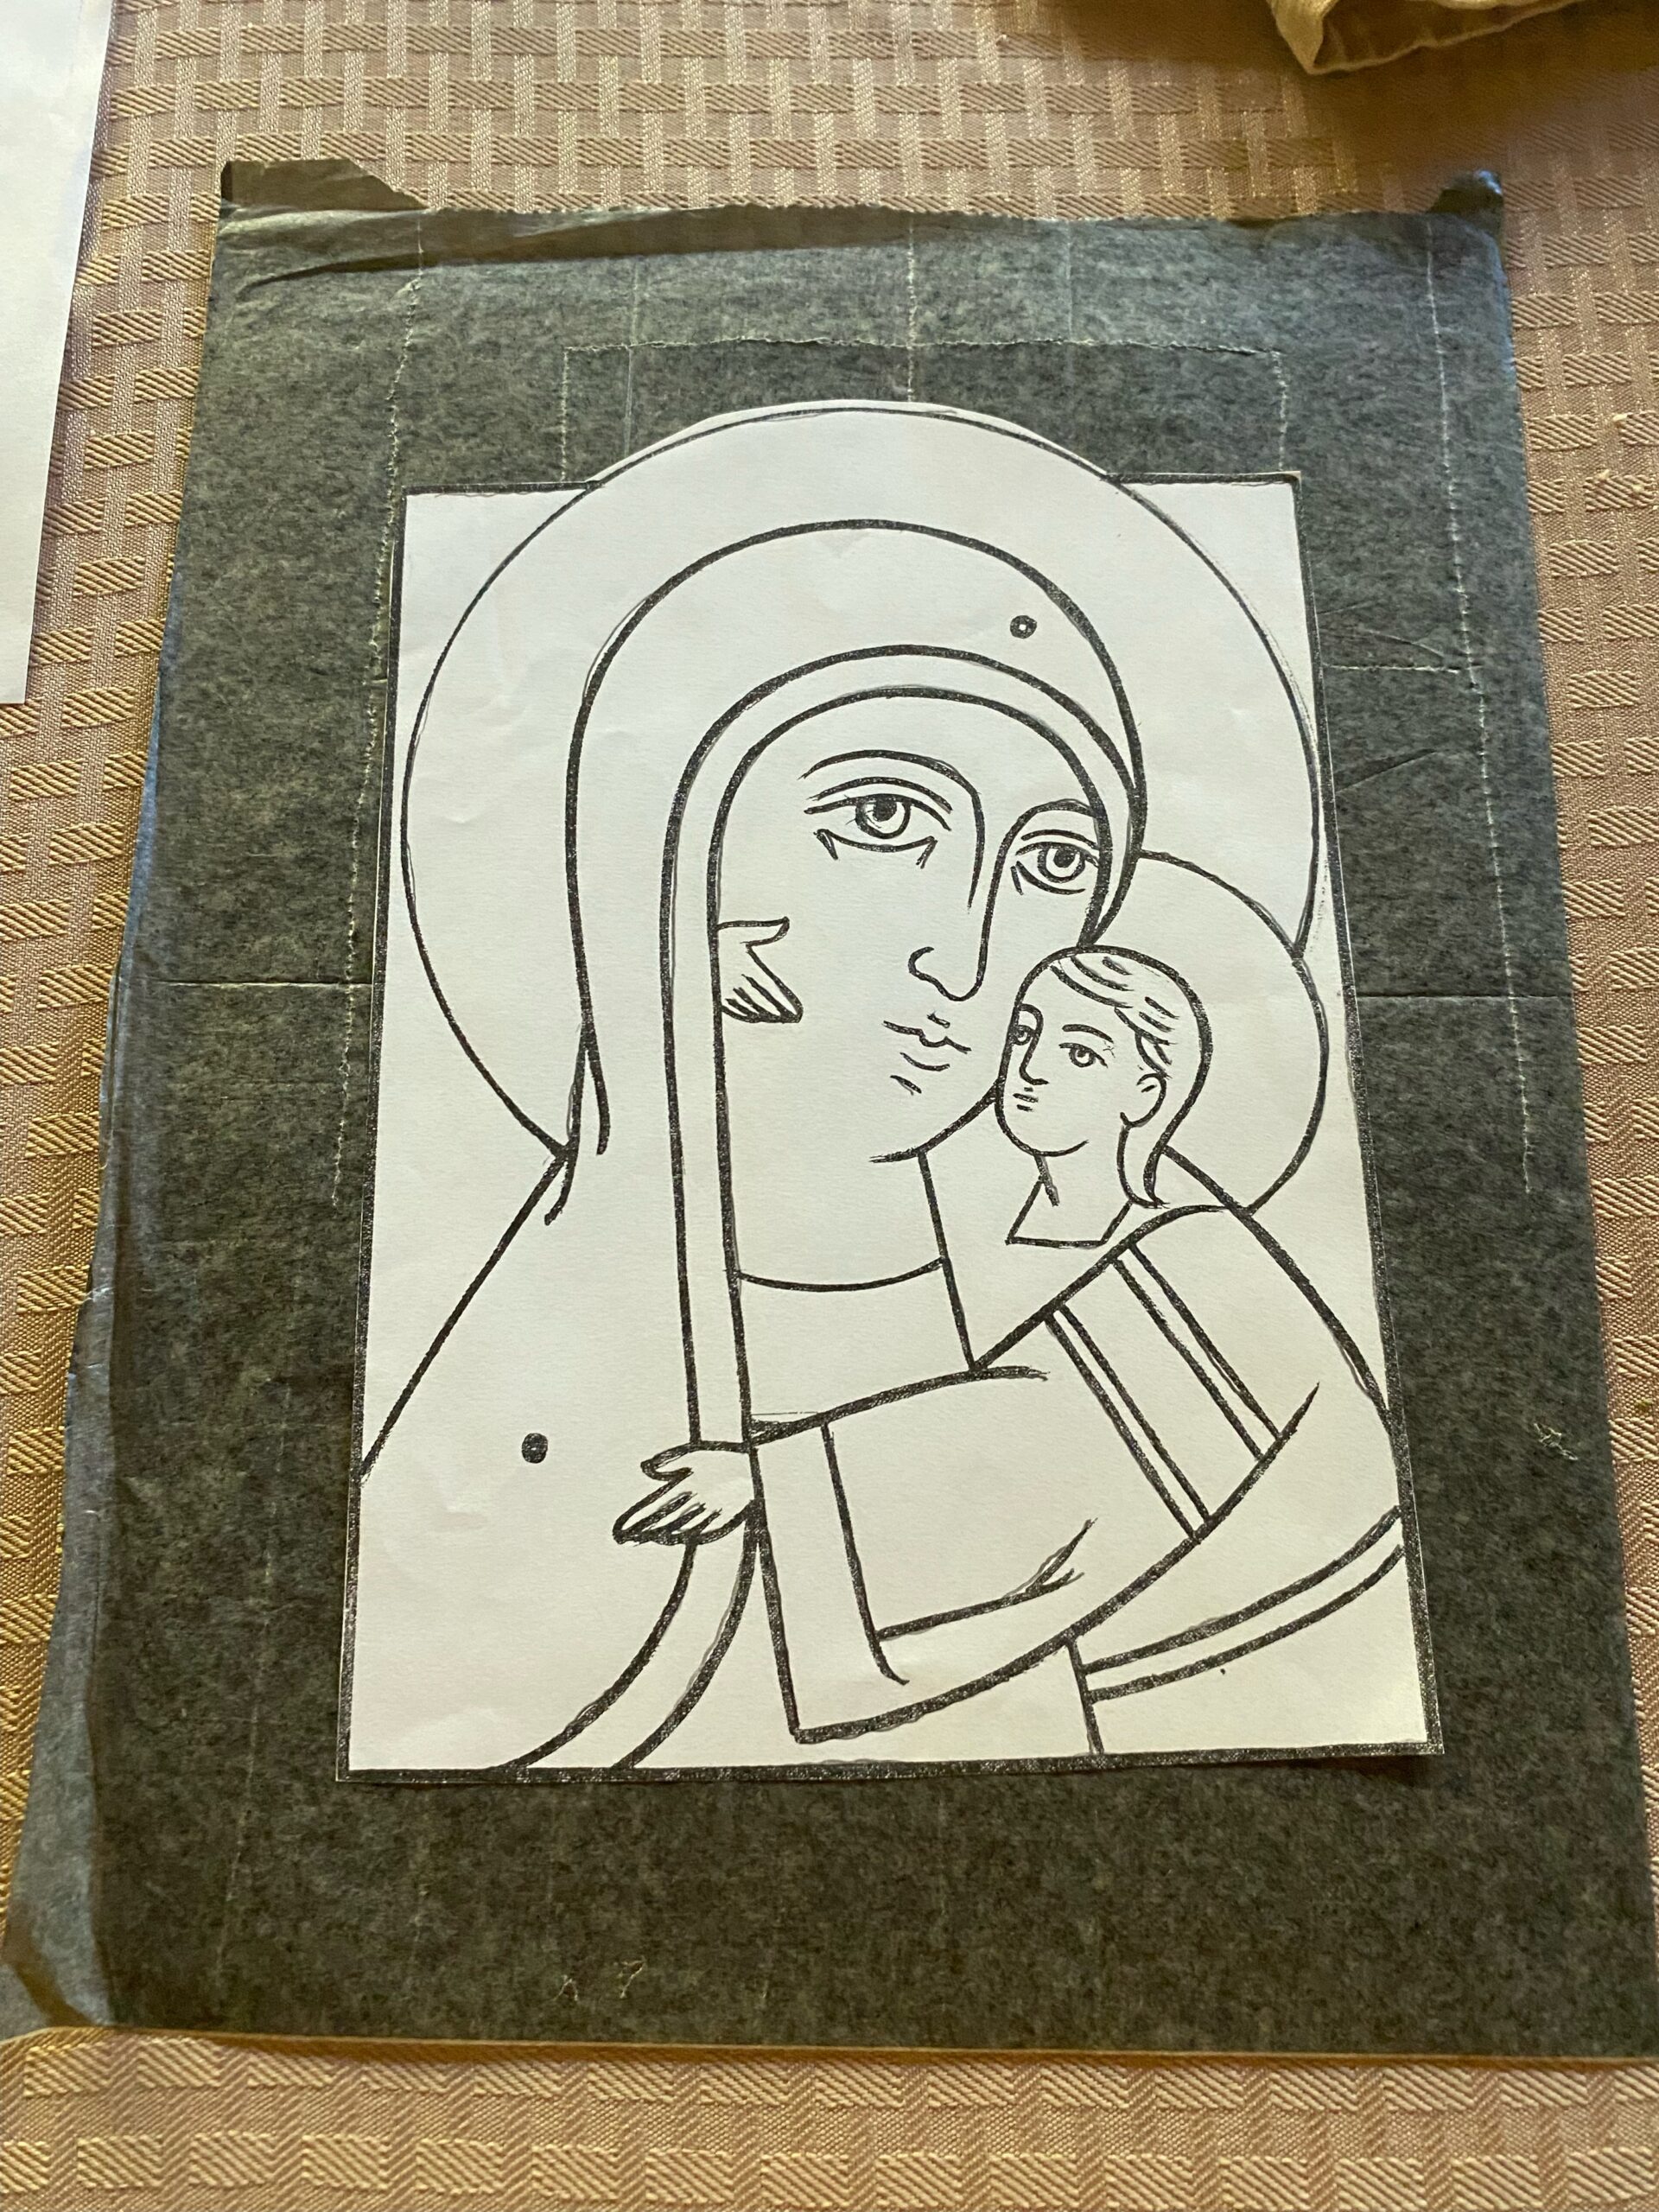
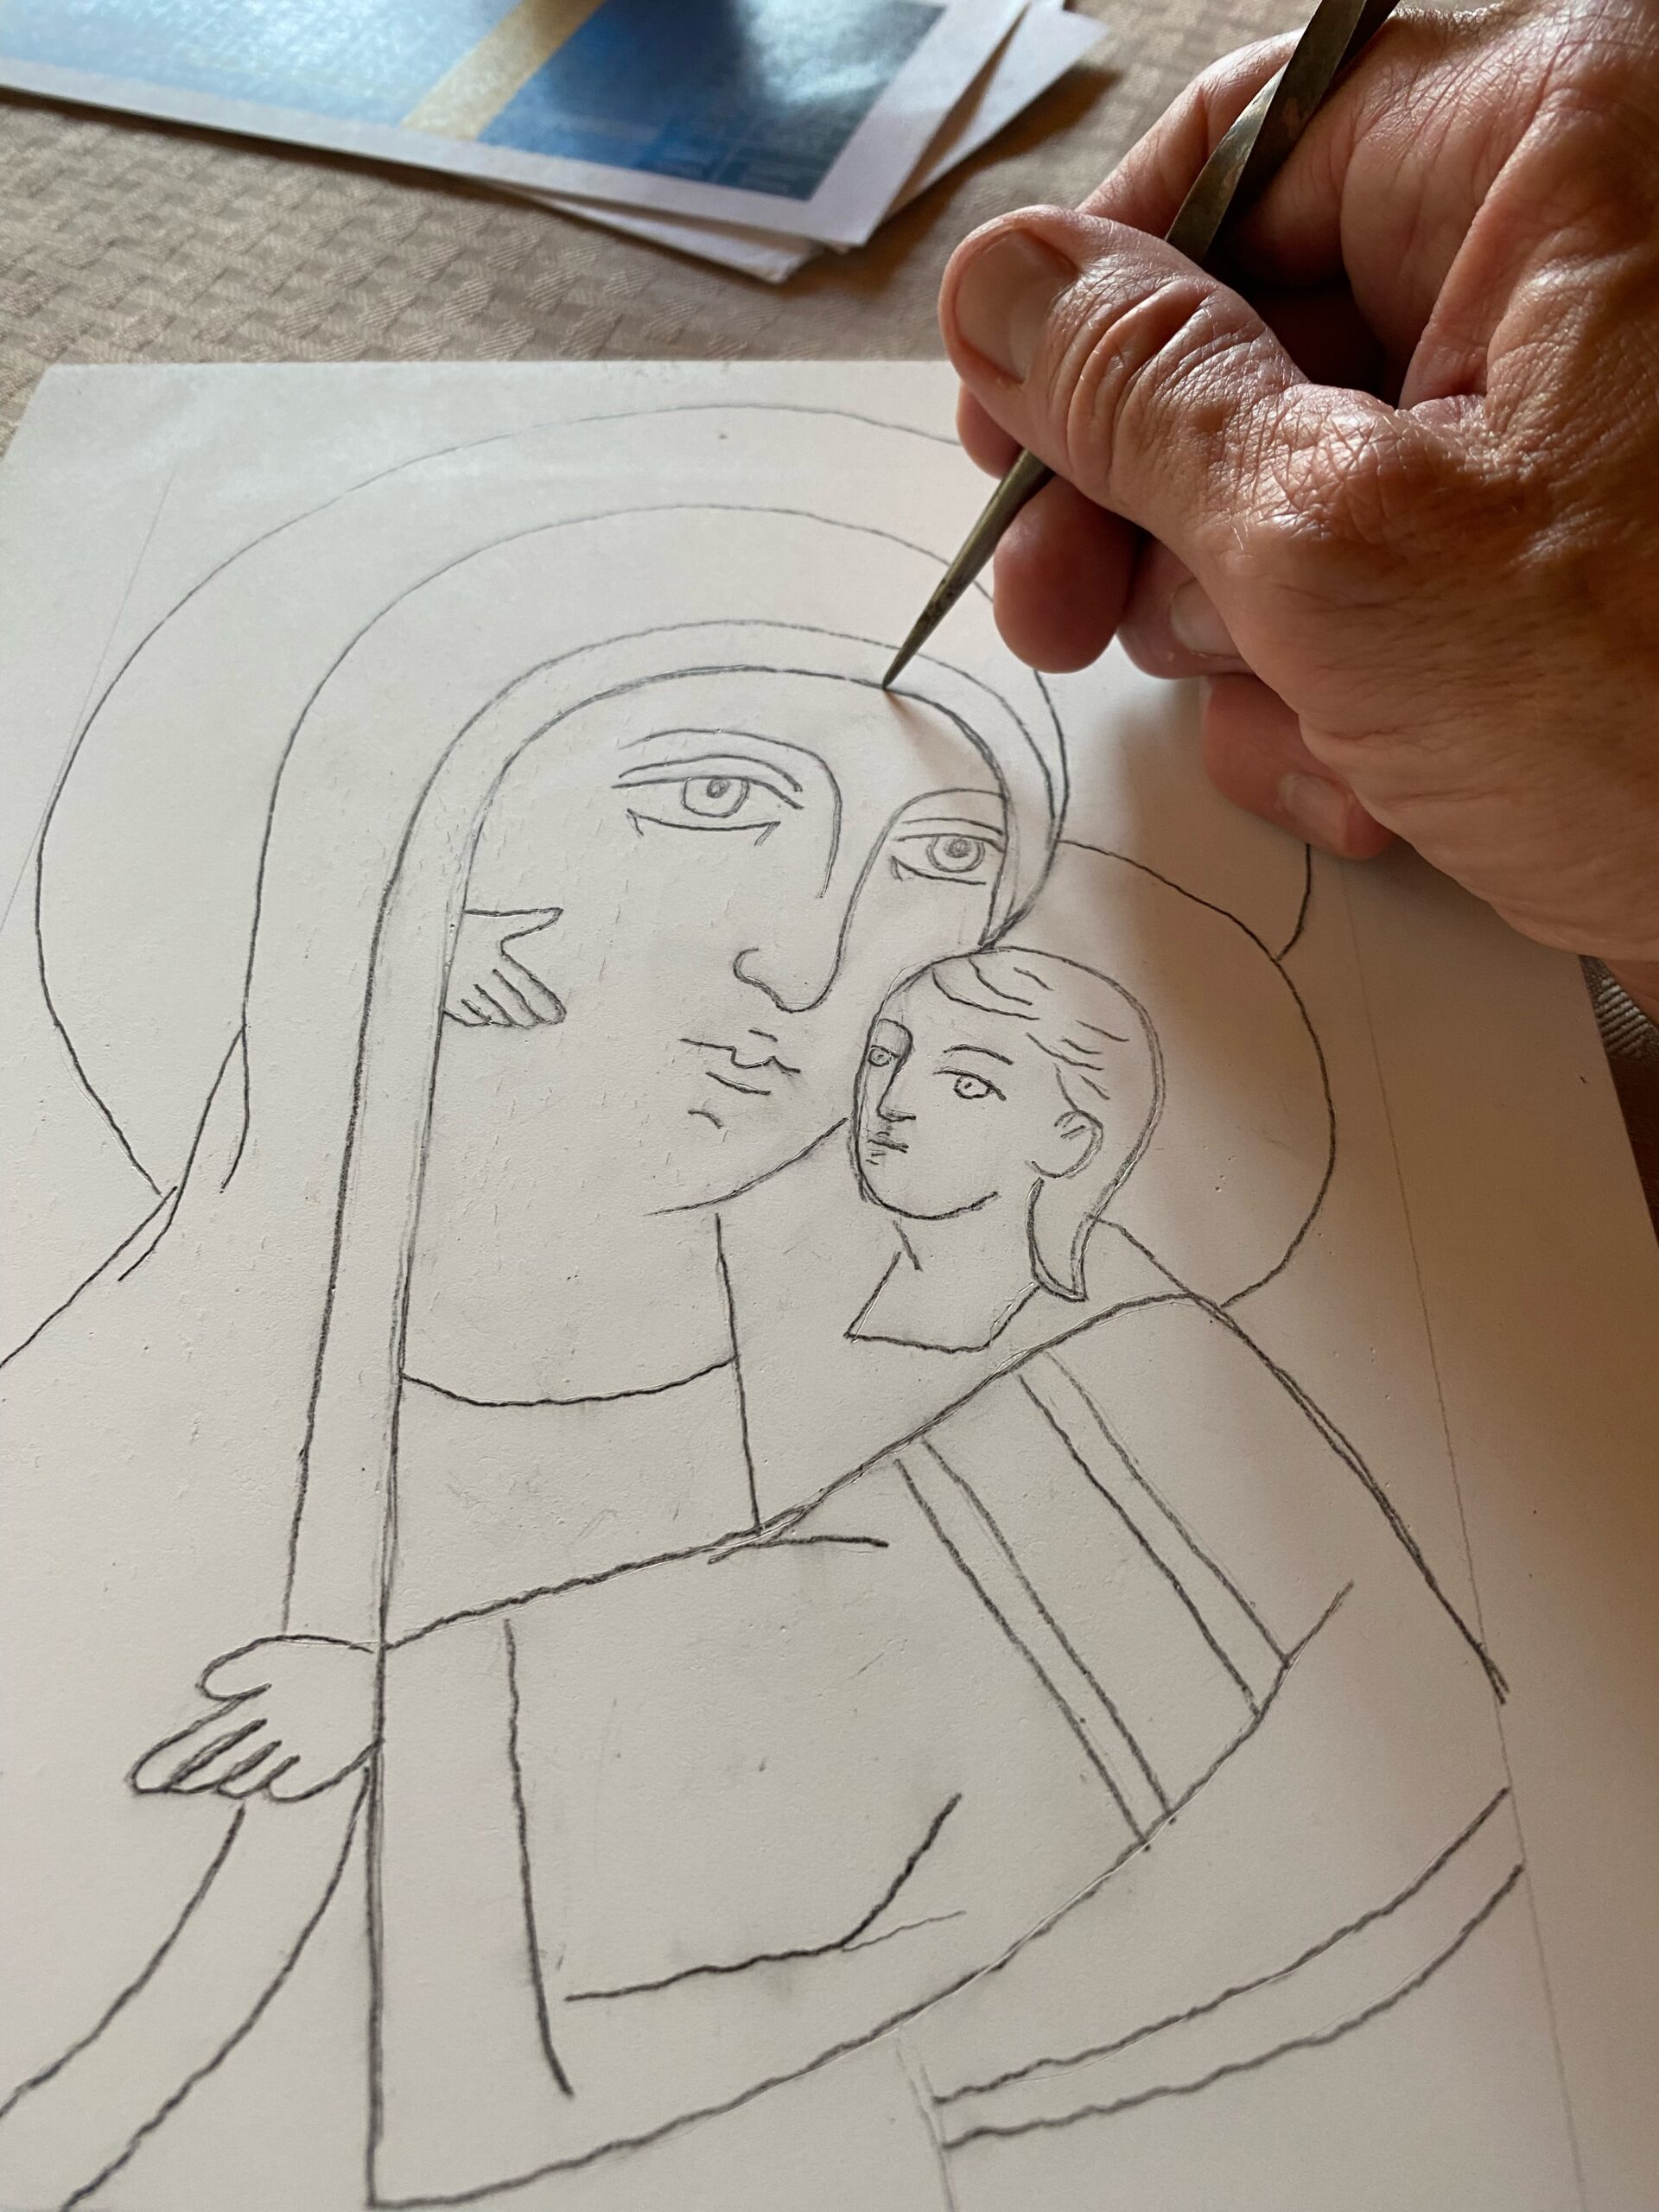
2. A drawing of the image is sized to fit the board. Graphite transfer paper is then taped to the board. The drawing is centered over the graphite paper, taped, and traced.
3. The image is cleaned up, mistakes erased, and then the image is etched with a sharp pointed tool.
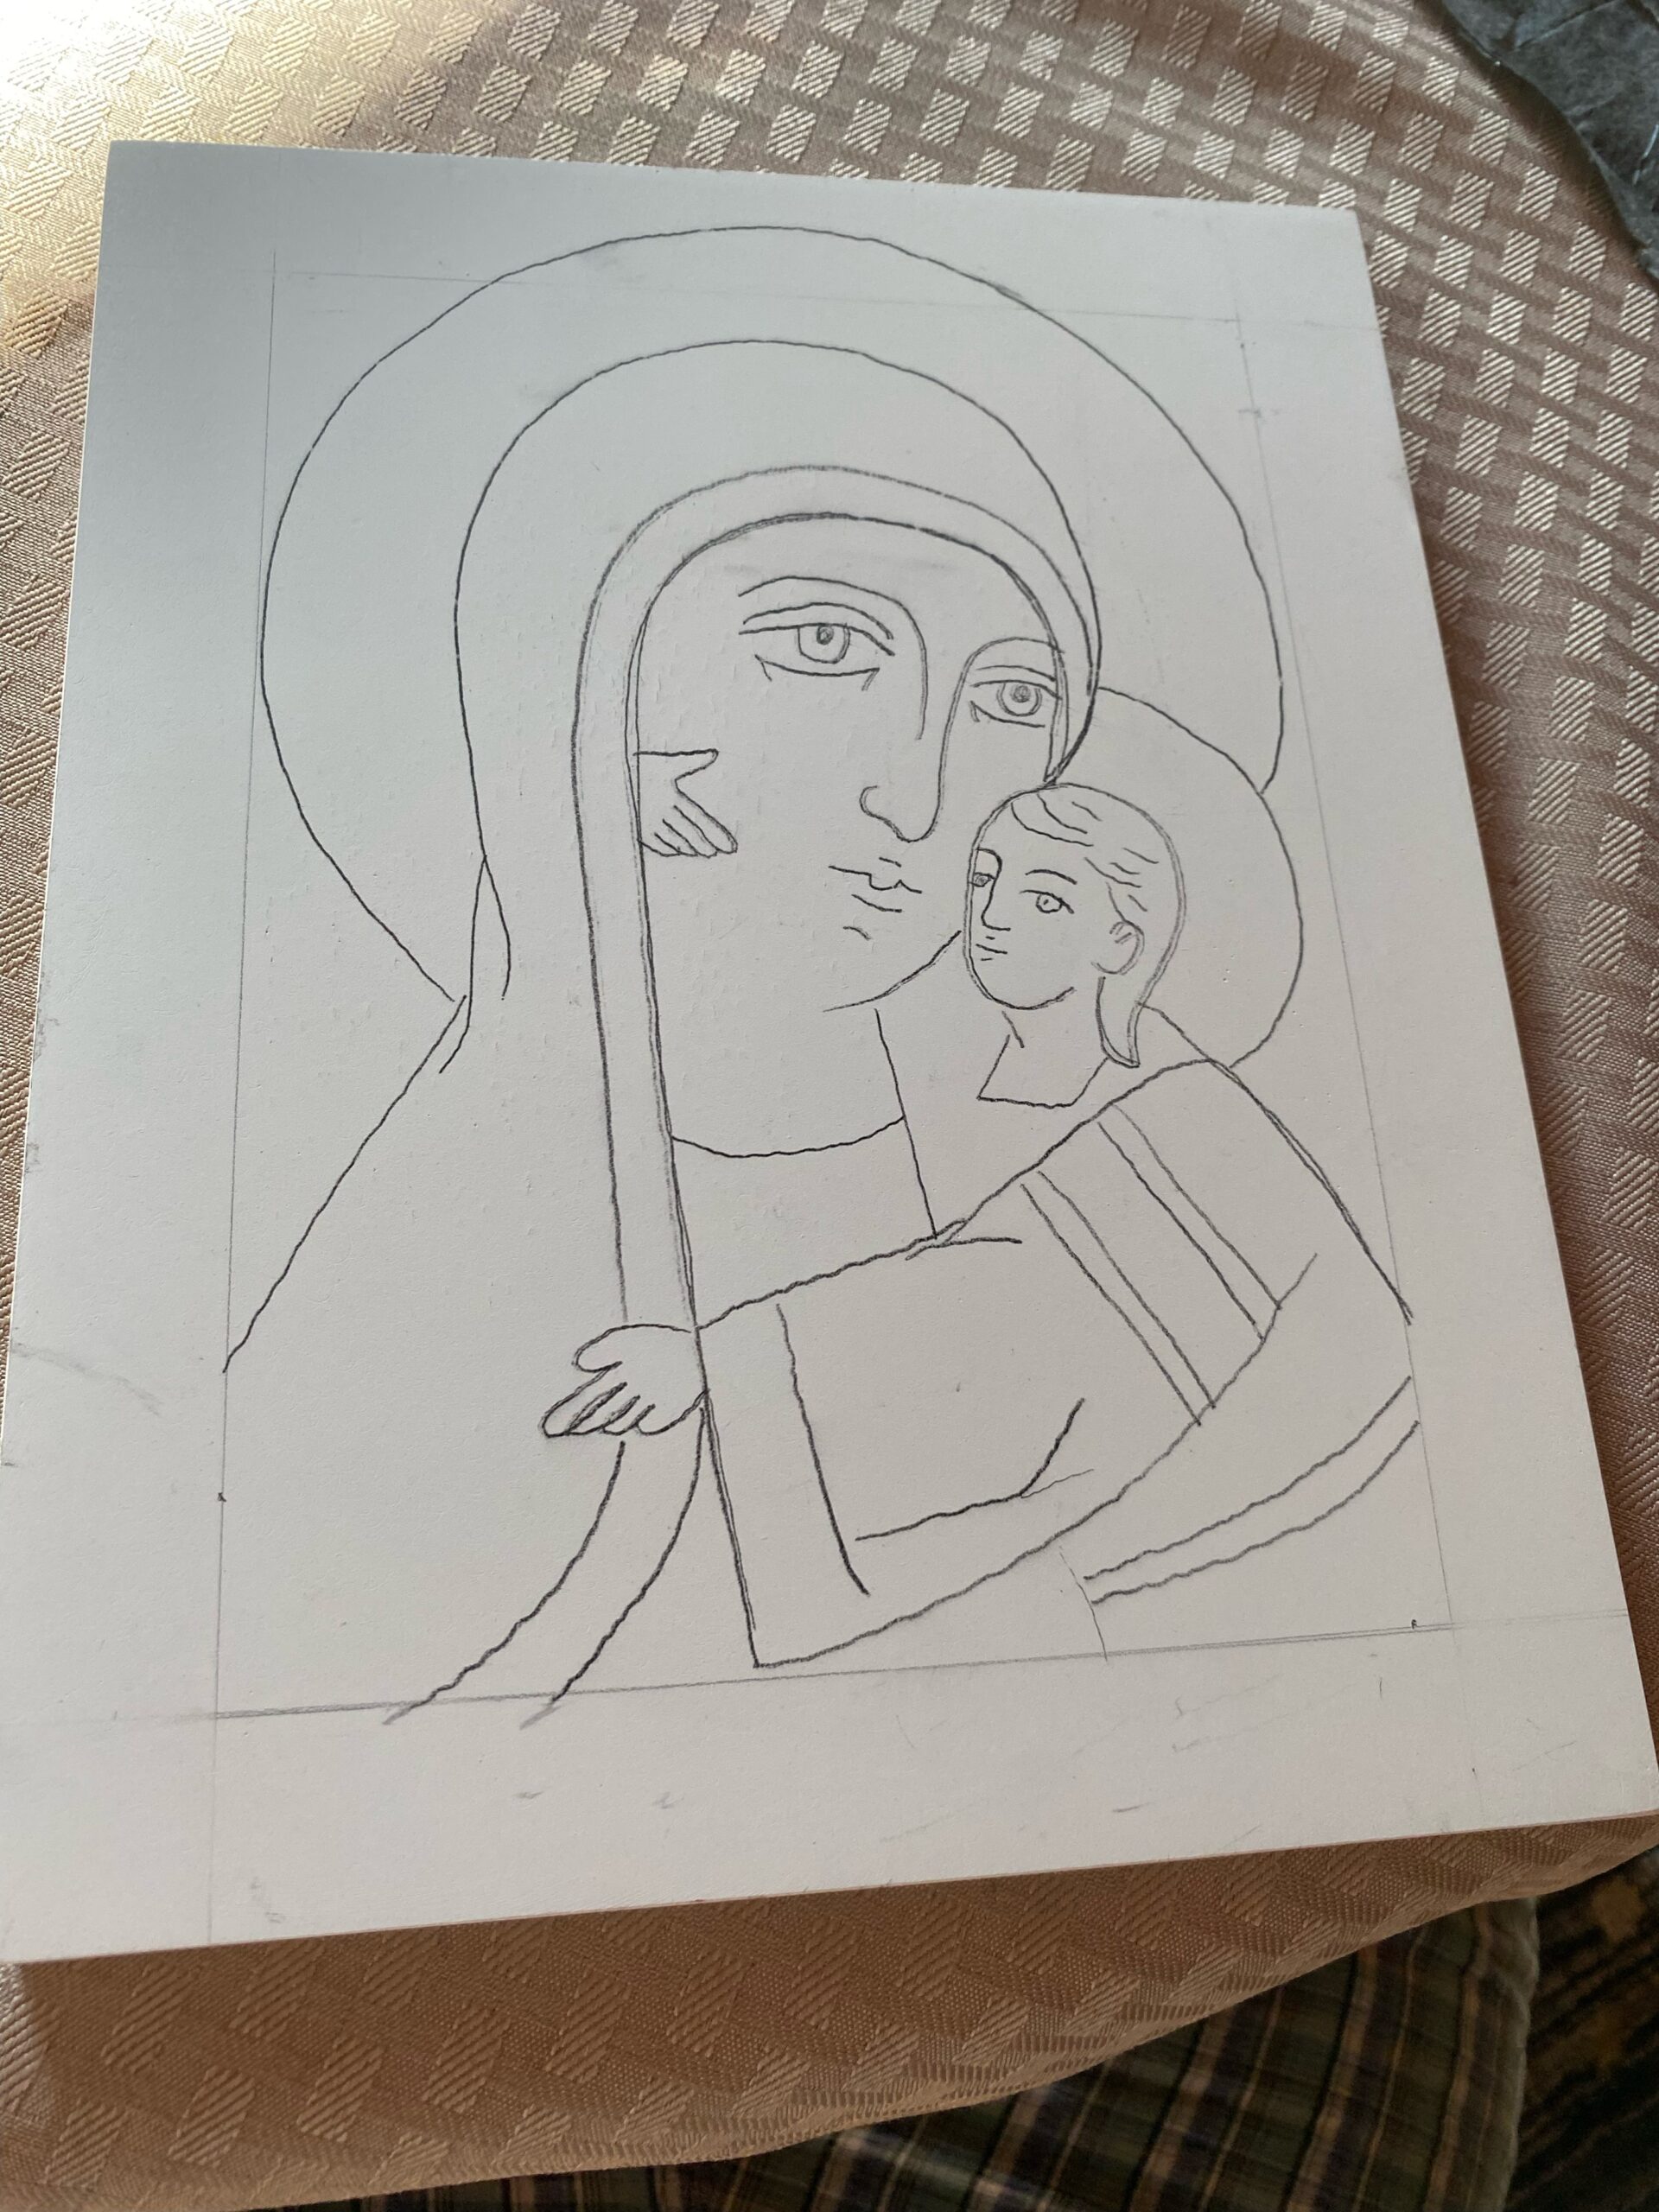

4. The image is then etched with a sharp tool. There will be so many layers of pigment applied, the etching can help to find the image.
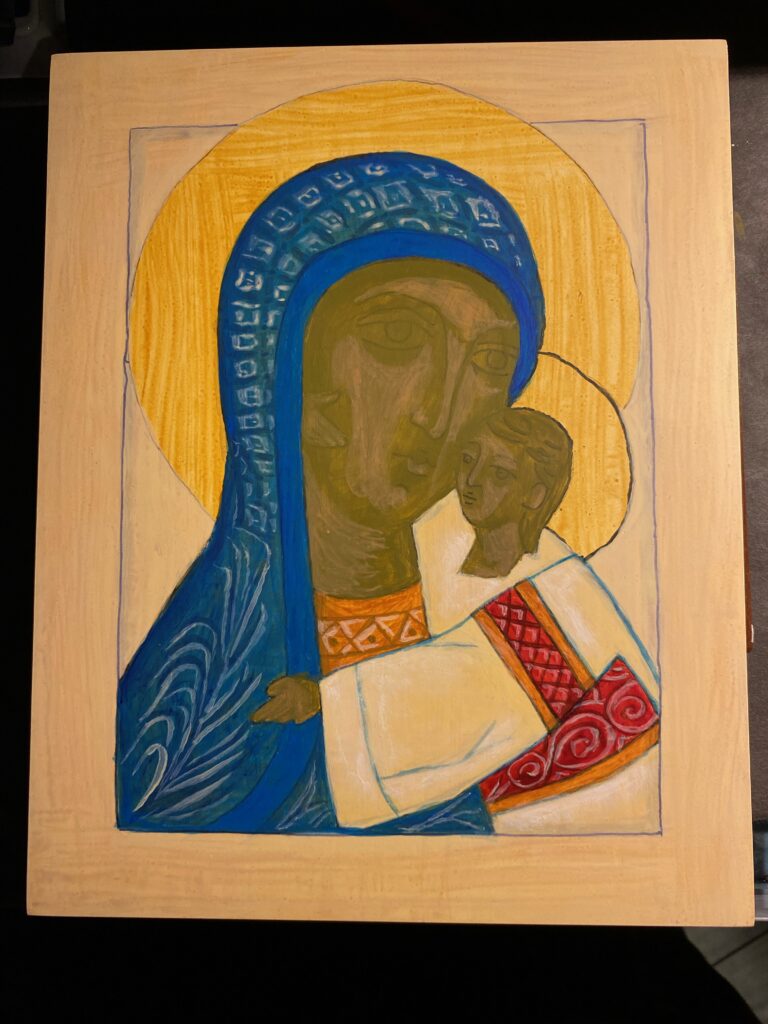
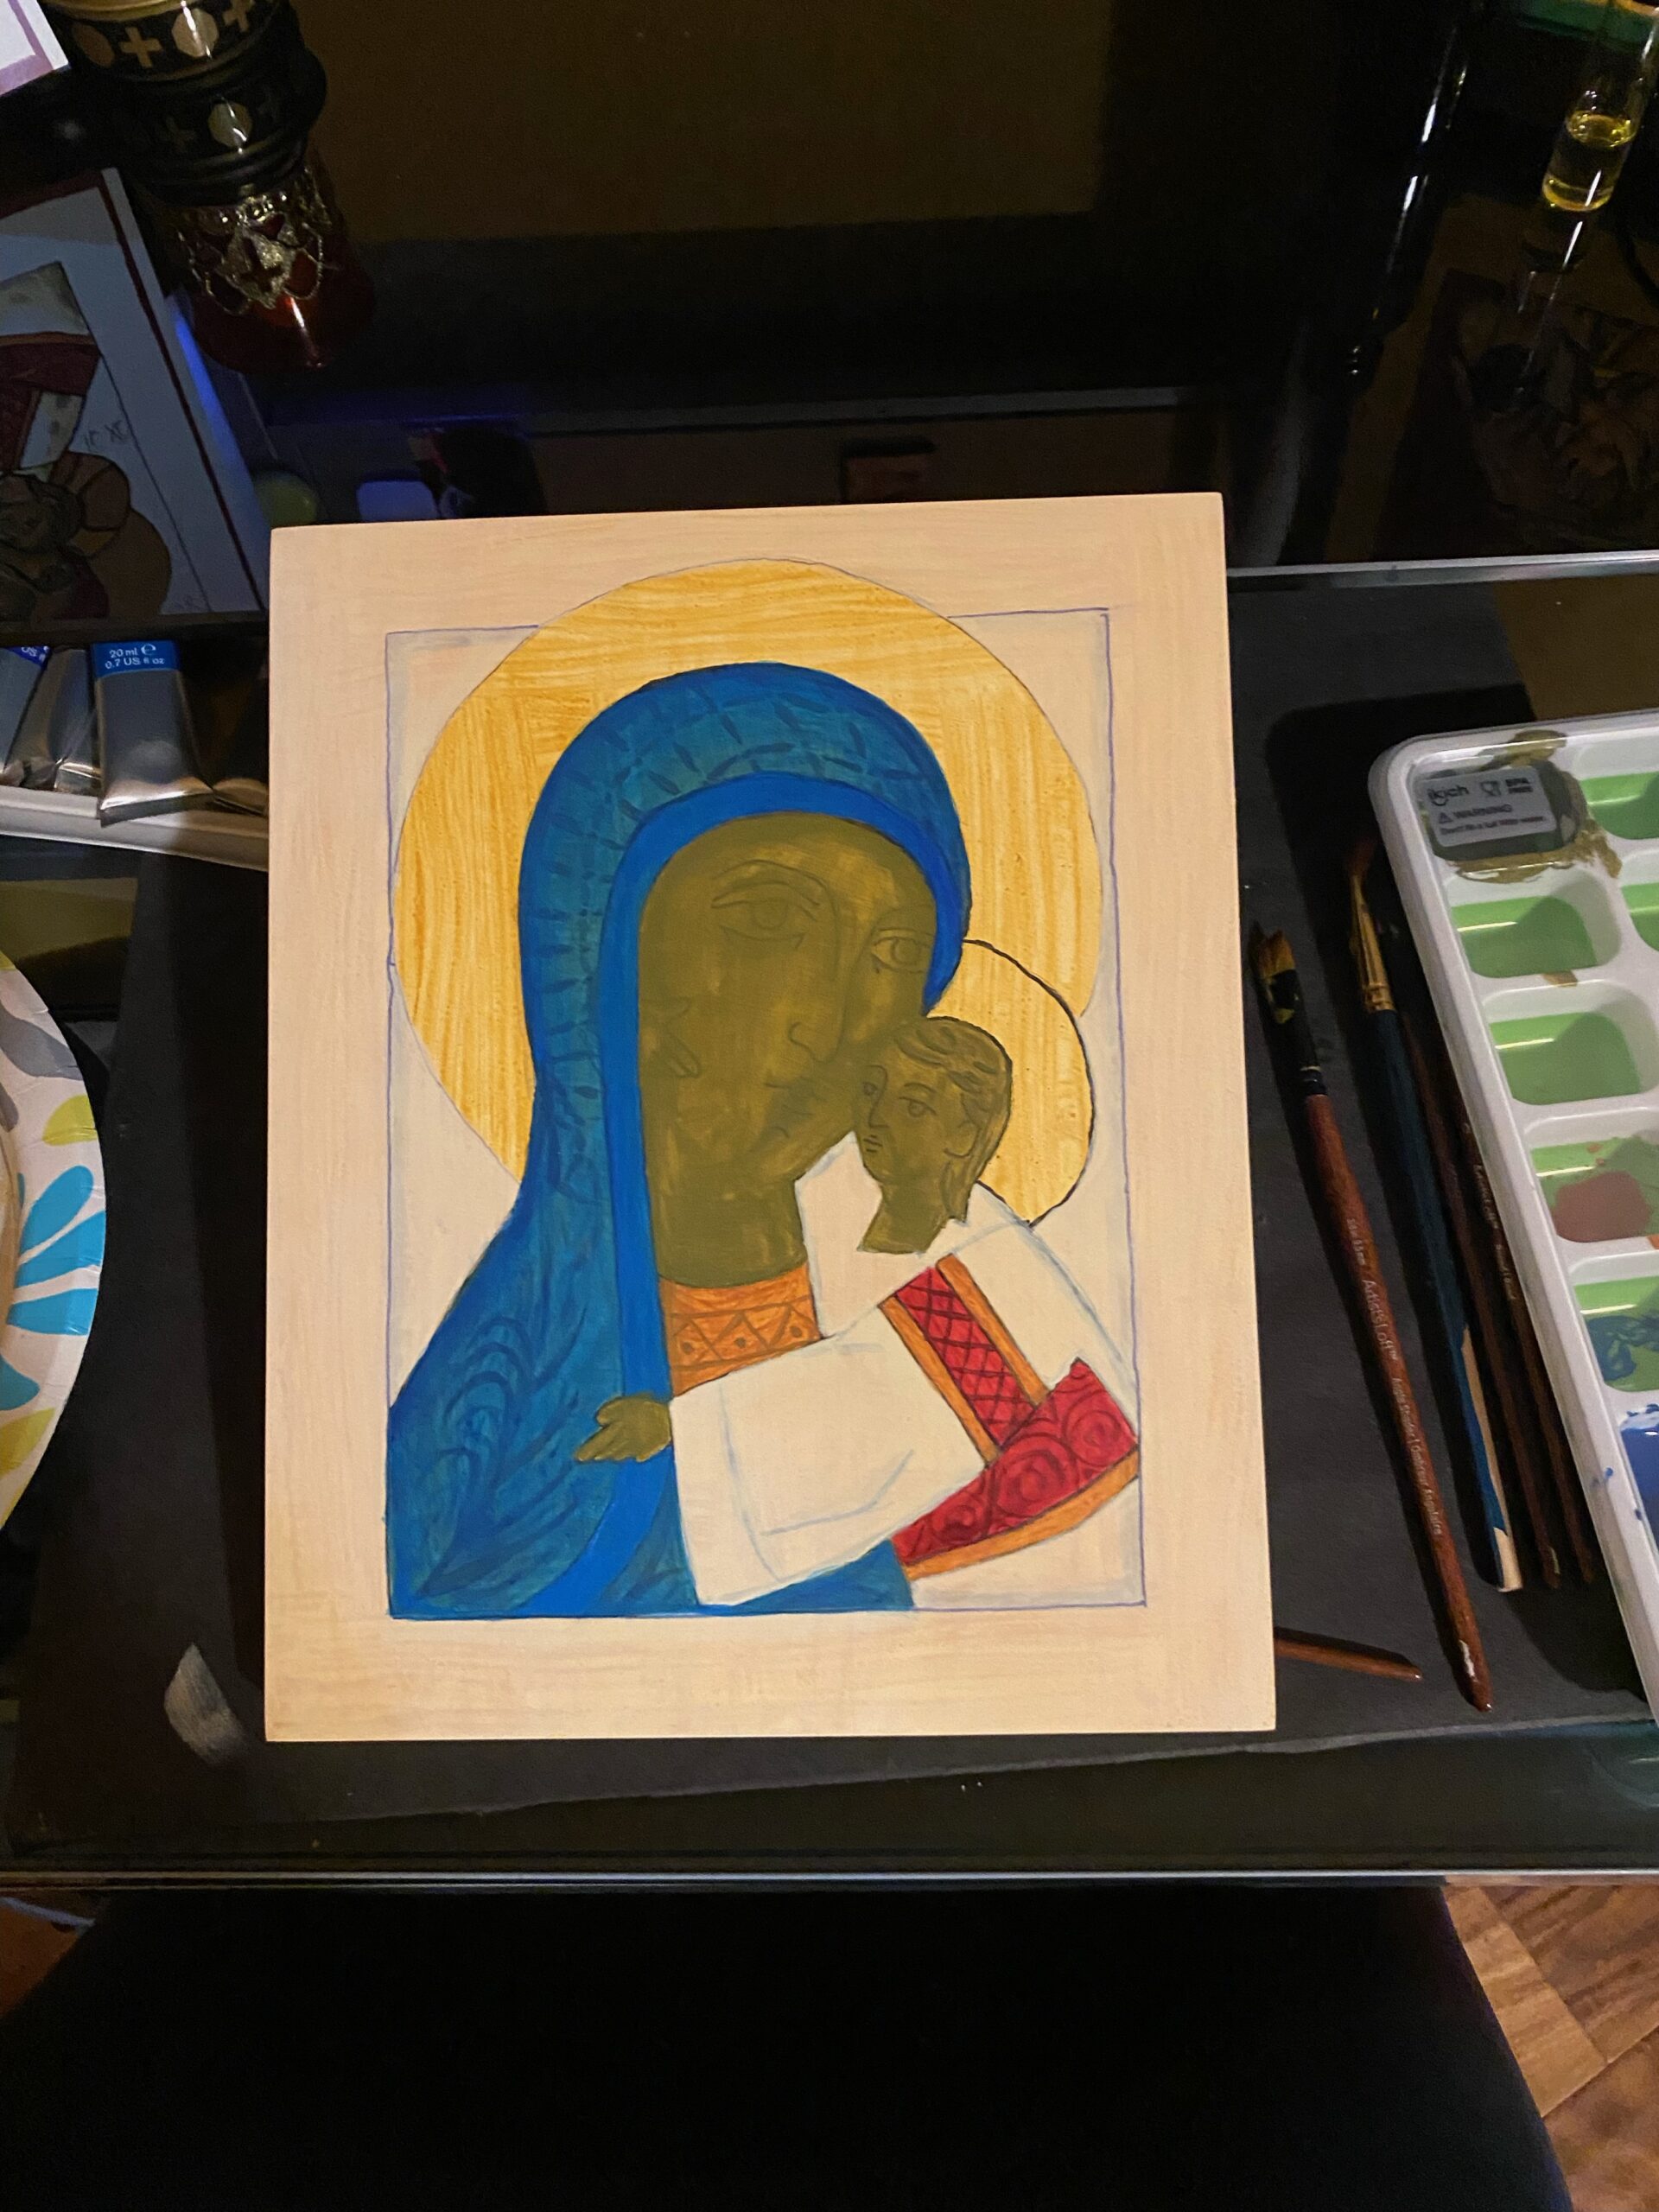
Writing an icon is a process applying many layers of a watered-down pigment to the board. Most of the time the paint is the consistency of skim milk. Eventually the image emerges from the board. On an icon the light shines forth from within the image. In Western art, an artist paints an image with an exterior light source shining on the subject. This is not the case with Byzantine art. The light shines from the interior of the image. Before I start adding color, I will add shadows which will give depth to the individuals and then I will add light (yellow gold) which represents the light of God.
5. I added shadows and detail to the clothing.
6. I added a layer of yellow gold to represent the light of God.
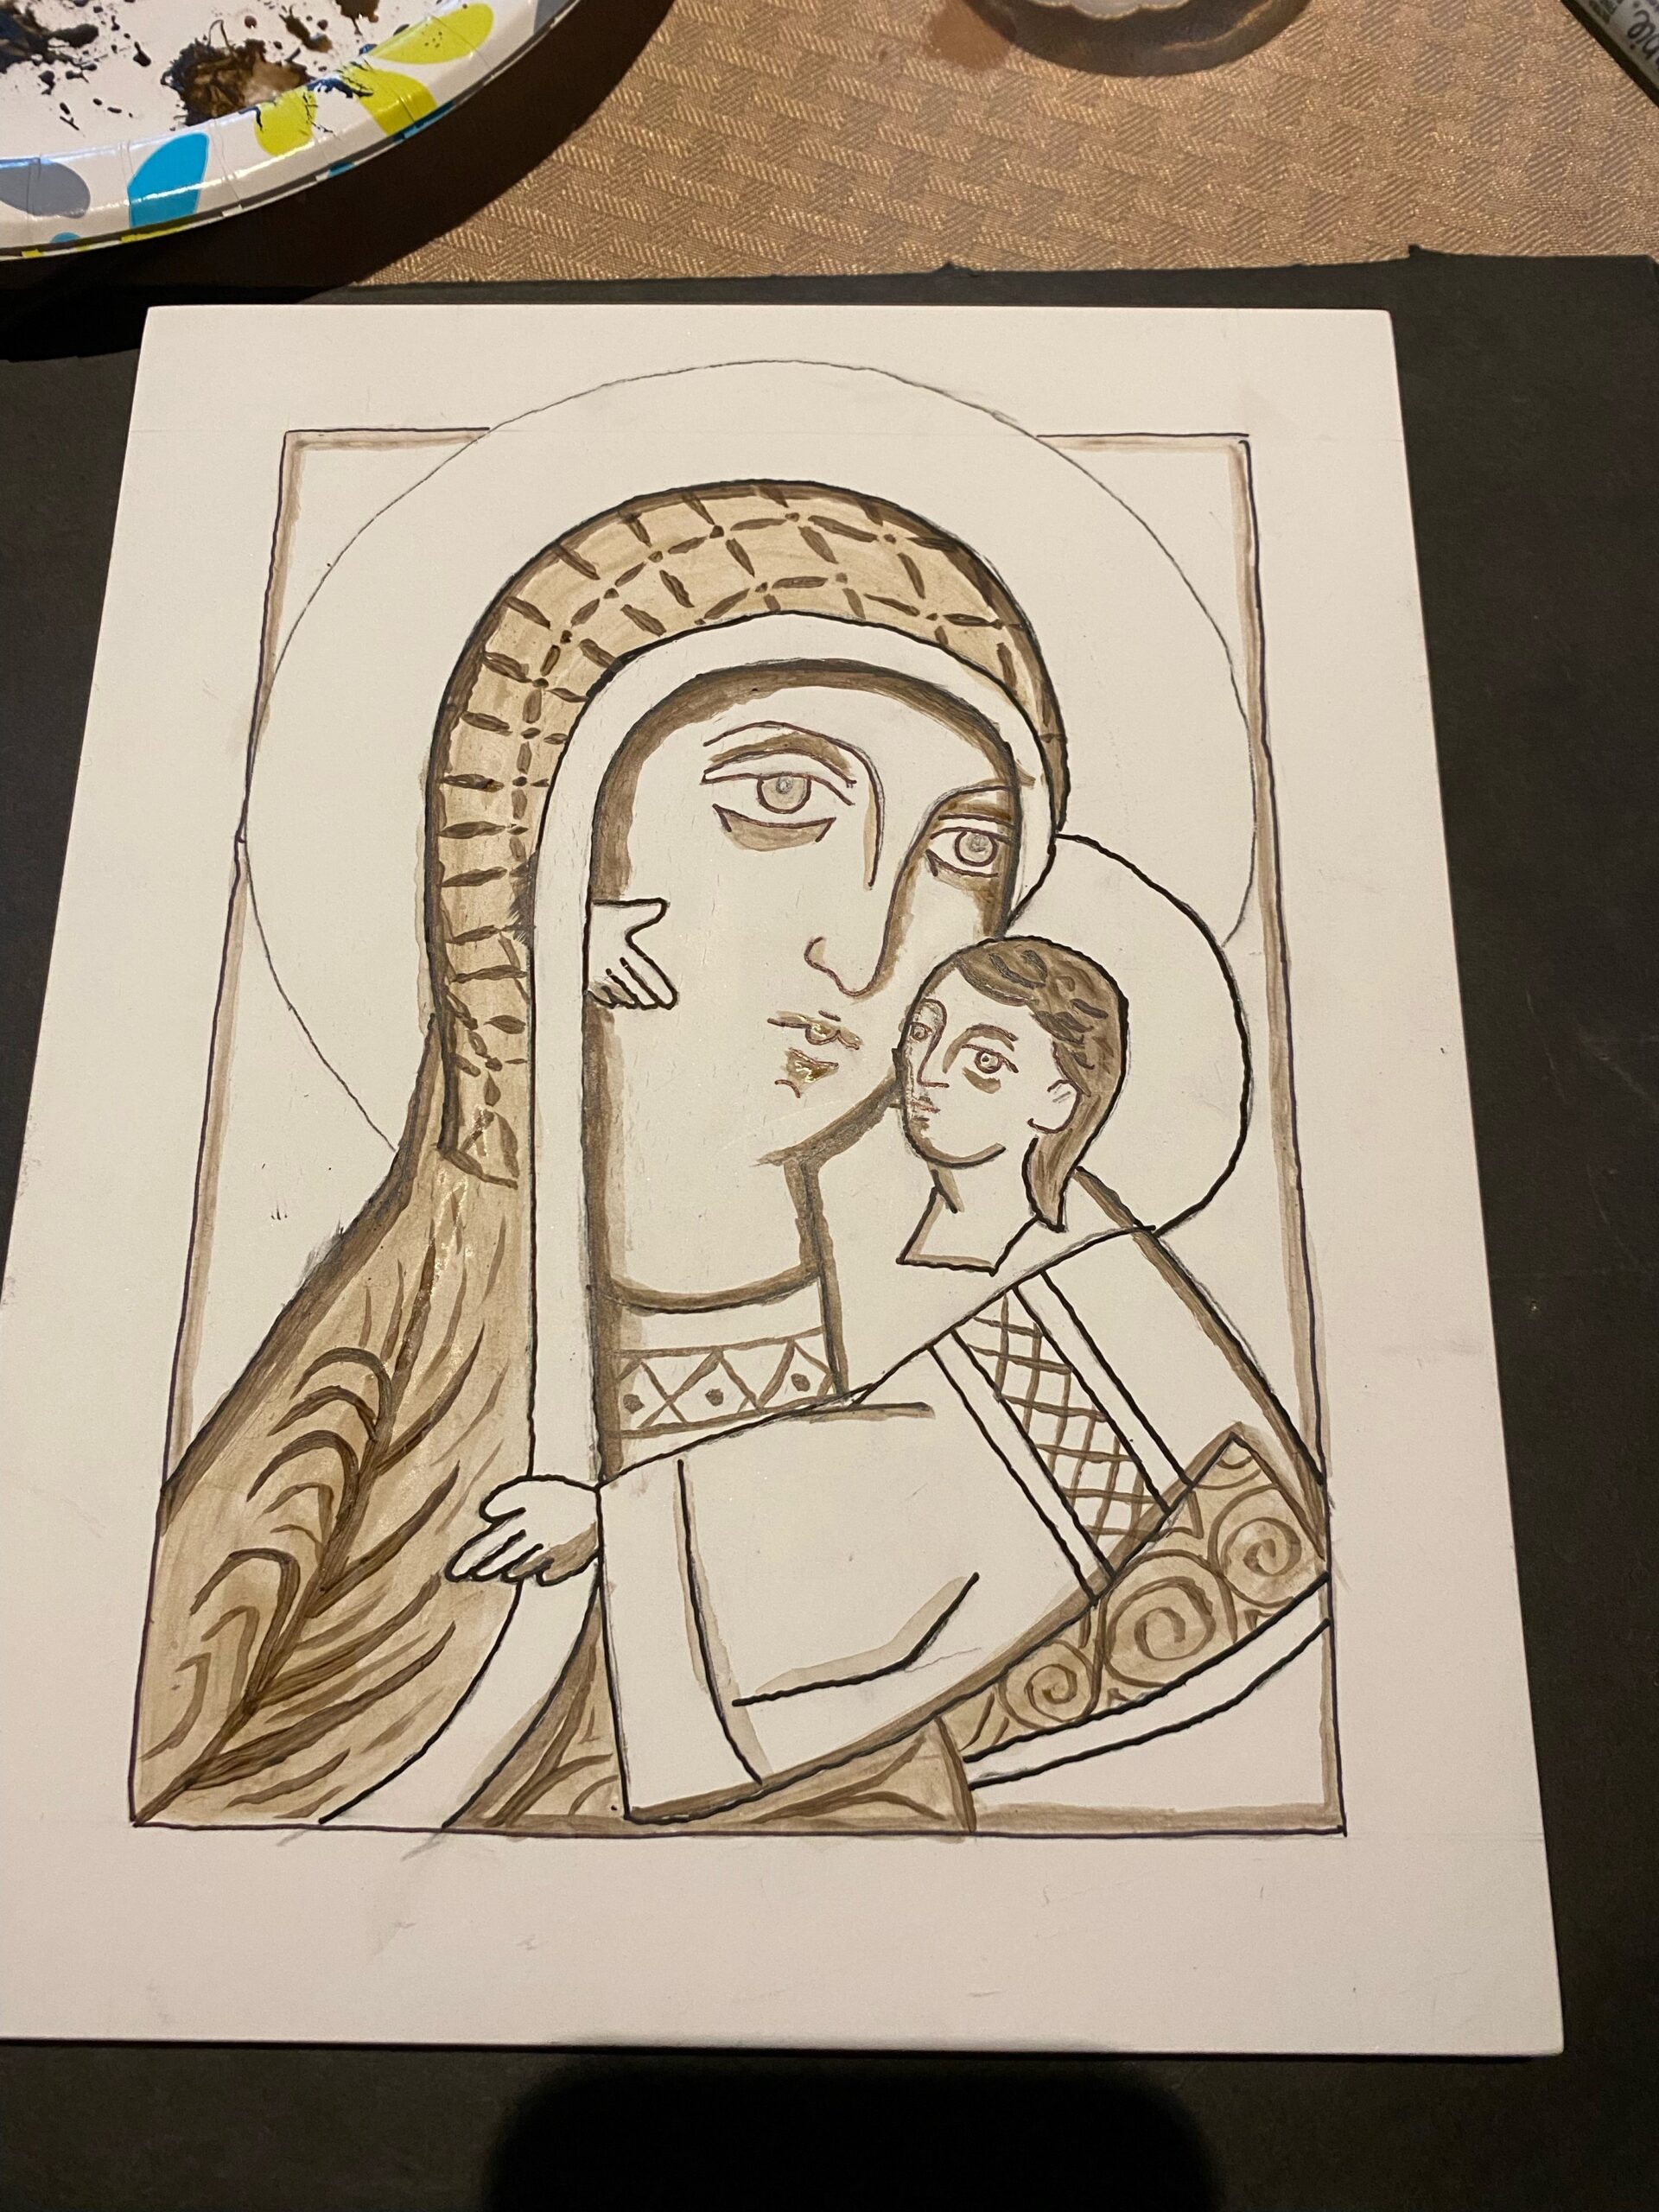
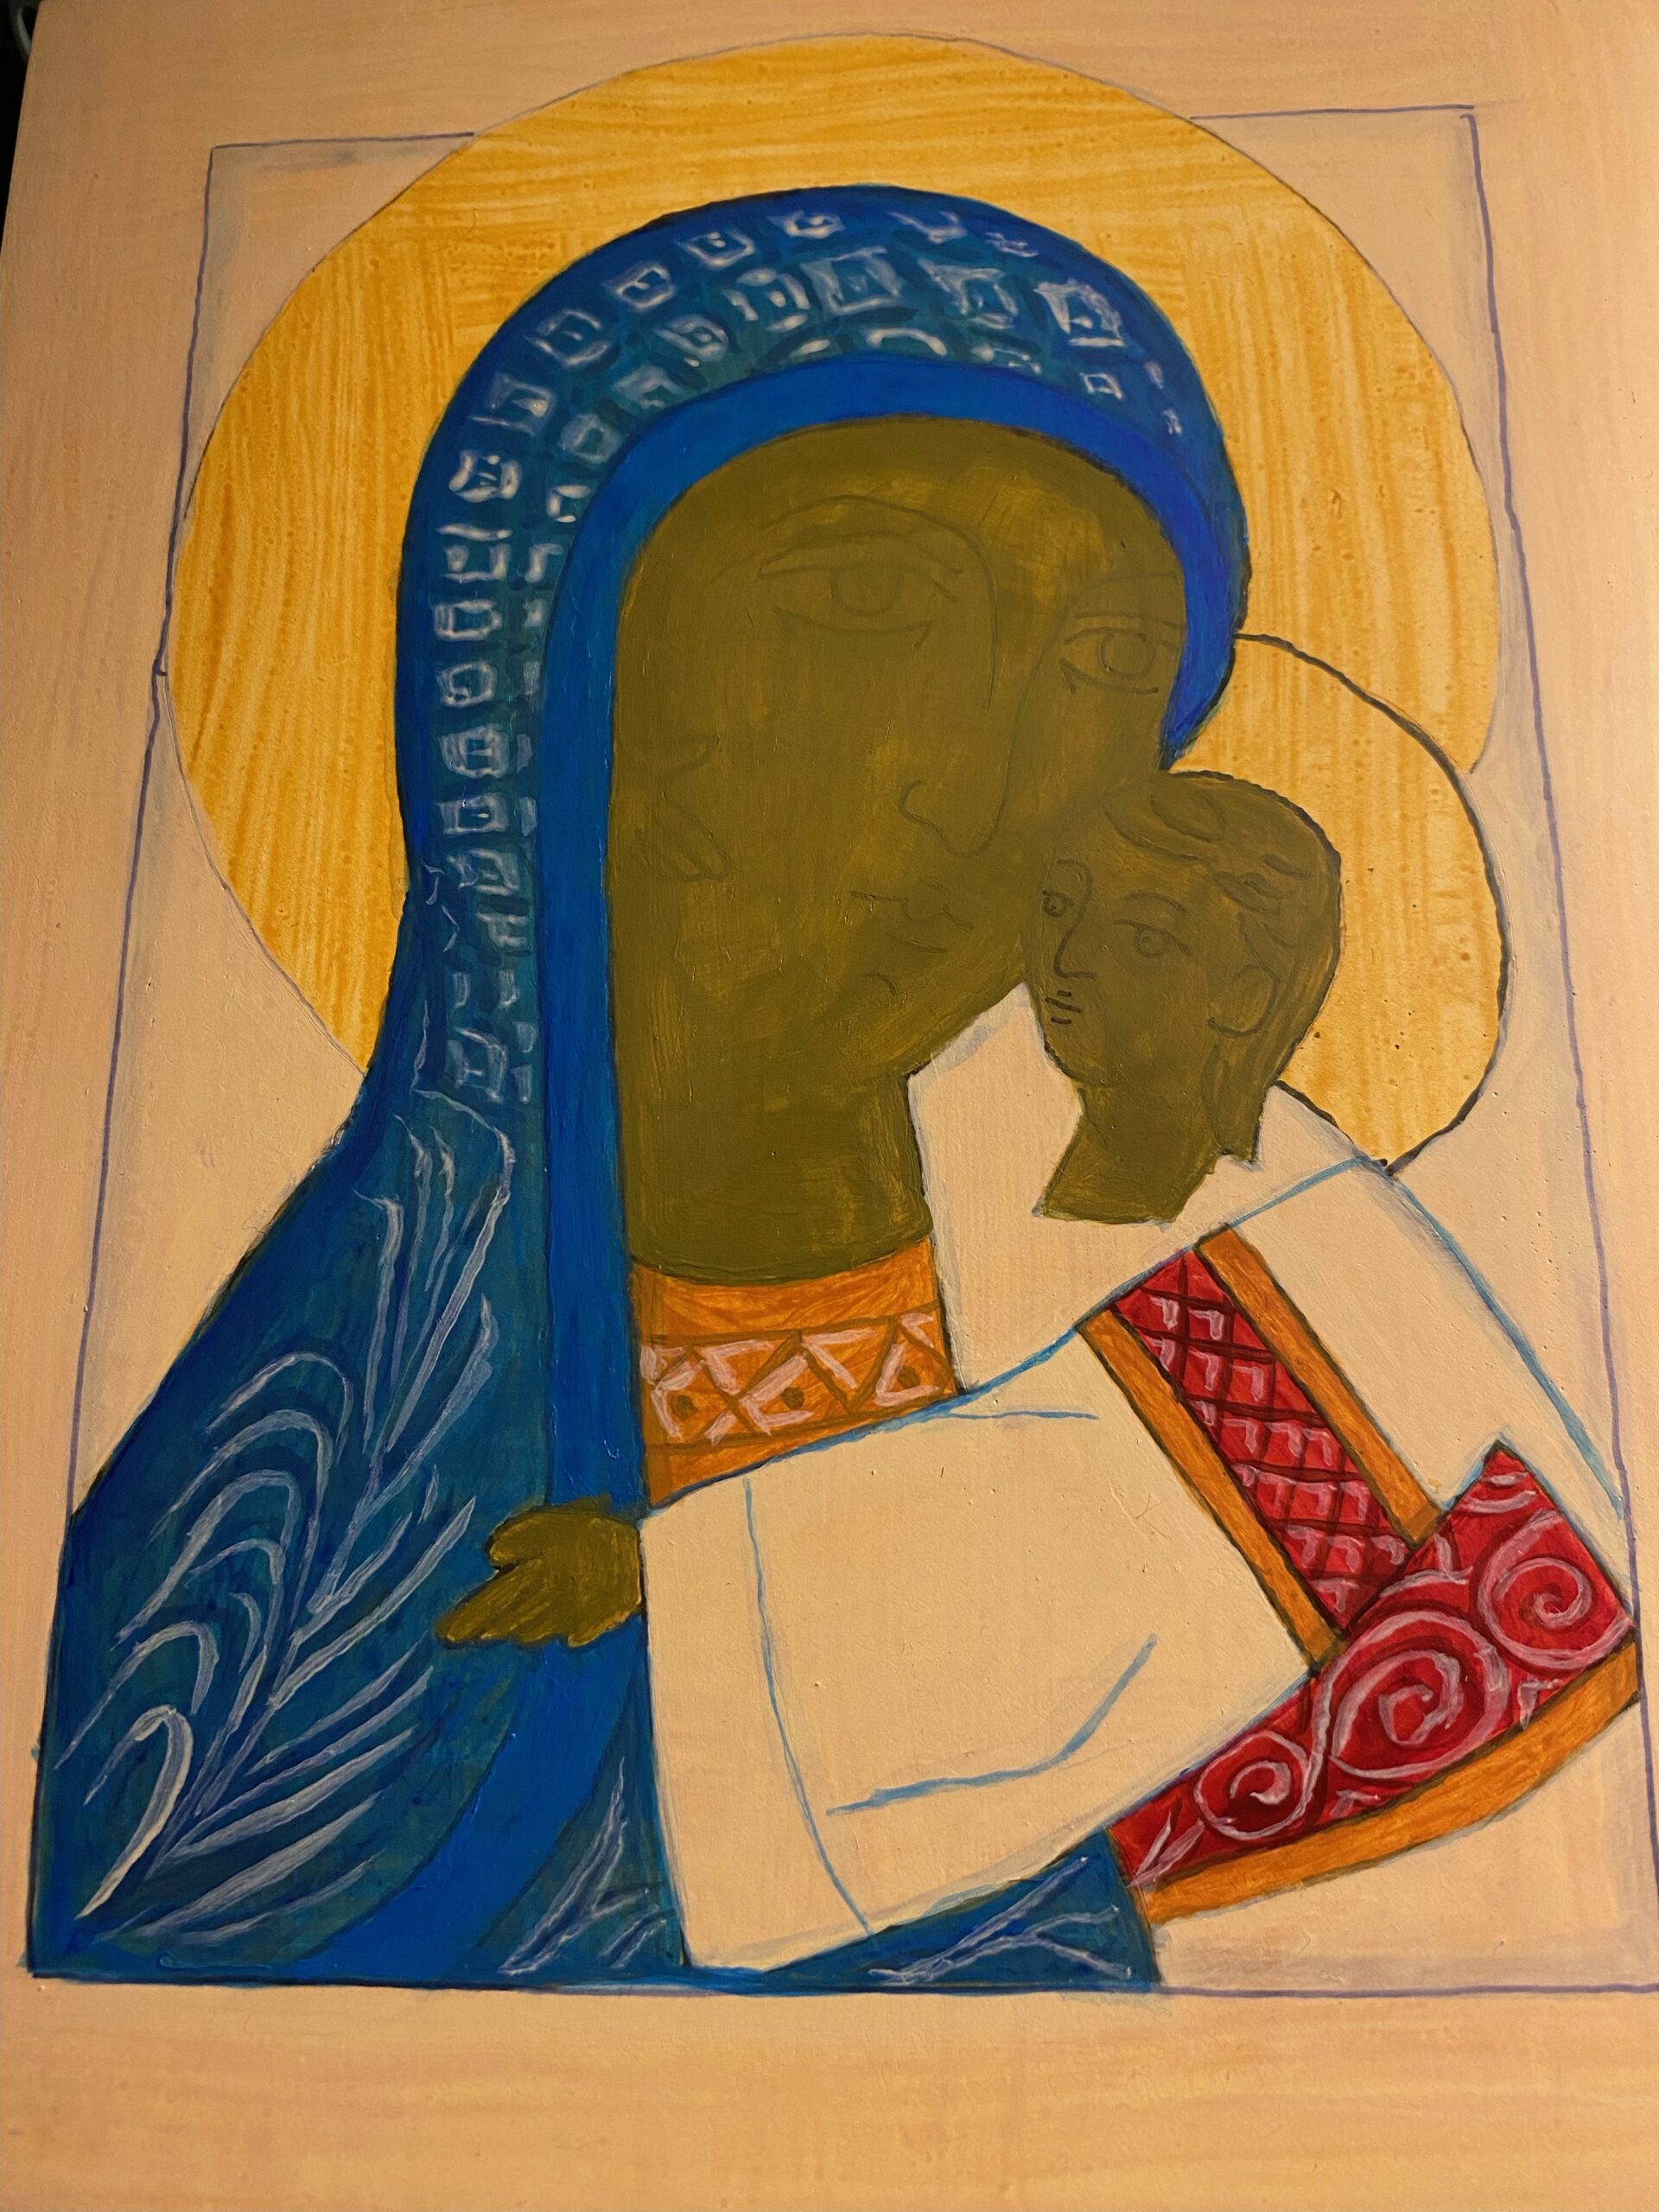
The next step is to mix a pigment that resembles green mud. This pigment is referred to as Sankir or proplasmos. A mixture of olive green is mixed with a yellow tan with a pinch of black. It is used on all skin areas and is a base. It is applied in skim milk consistency with about 4 layers so that the image lines are still detected. From this base, layers of lighter colors will be layered upon the base until the face emerges from the light. Remember, the first coat on the board was a gold yellow.
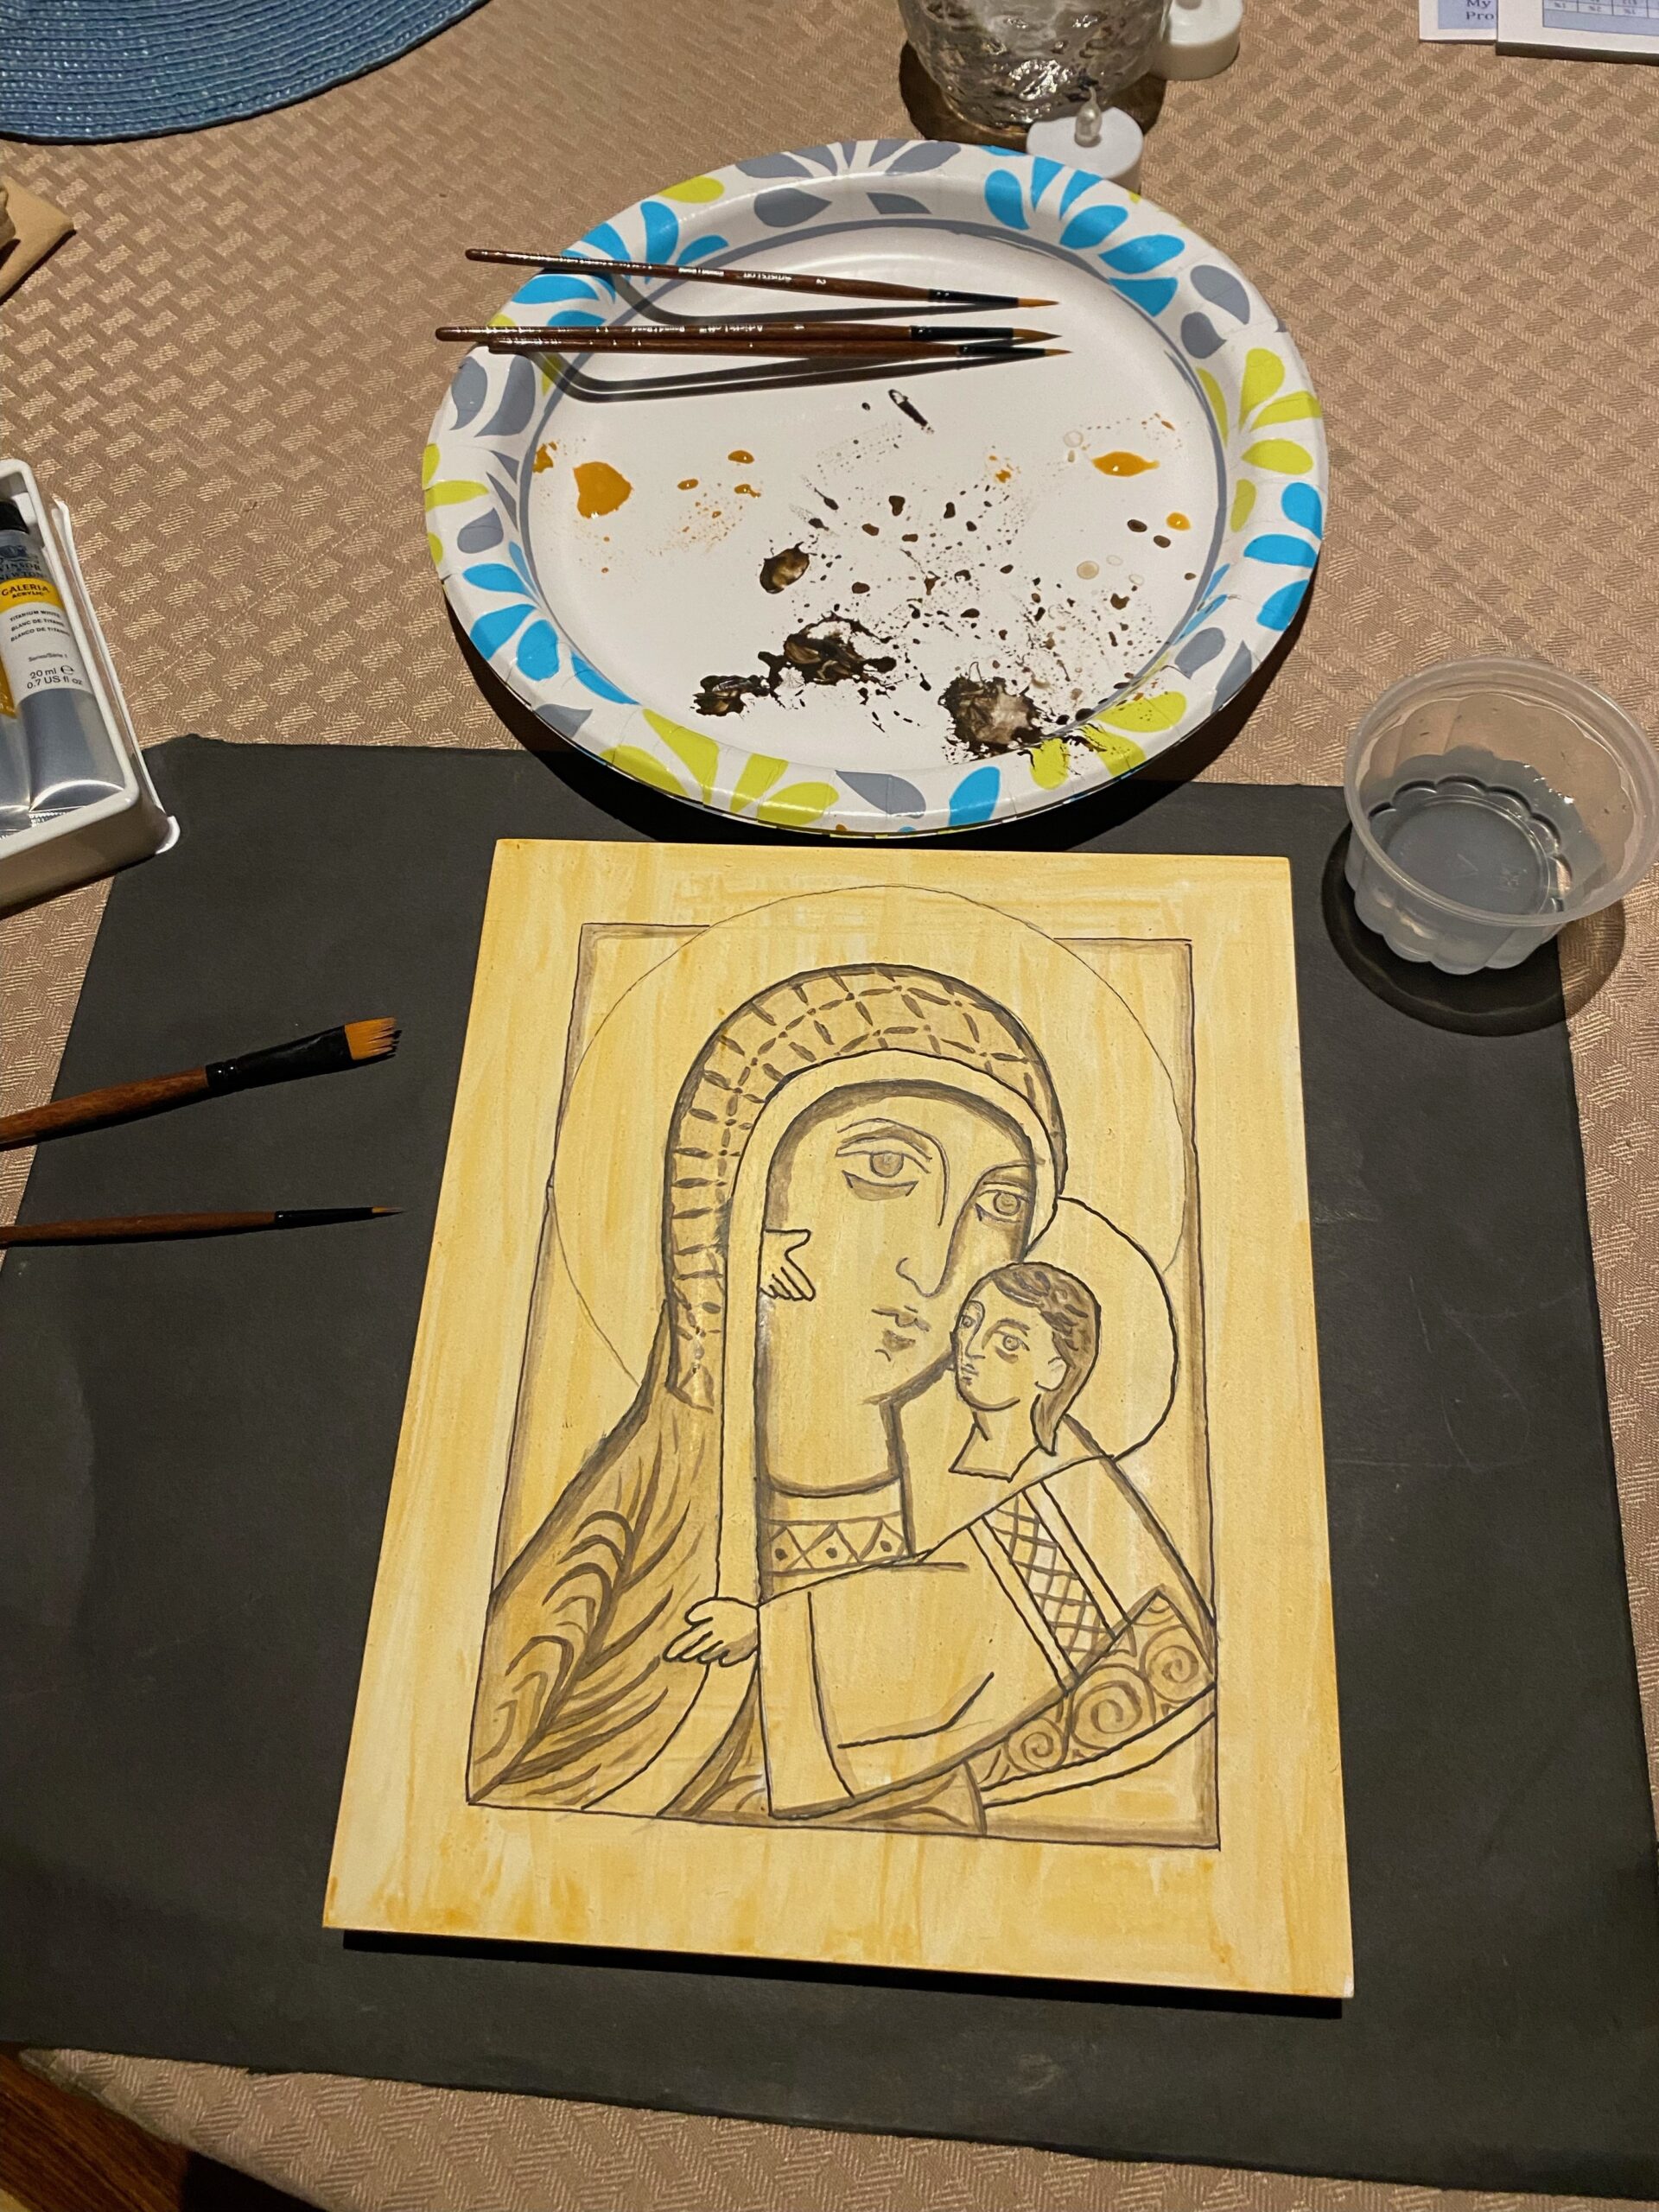
My next step is to add some embroidery to the clothing of Mary and Jesus. This just adds some detail so that the clothing is not just a plane solid color. From a distance, it will give depth to the individuals.
My next steps are to add detail and depth to the clothing and to begin working on the faces. I first add embroidery to the clothing. From a distance, this will add interest so that the clothing is not so plain. I will add a layer of a yellow/white to the shirt of Jesus. I then add a brighter white the edges of this shirt. This will give the impression of folds. I then begin the many layers of a cantaloupe/peach color to the faces. This is extremely watered down pigment and consists of many layers. This pigment is eventually lightened and the faces will slowly emerge.